Black Seed Oil – The Powerhouse Oil You Need In Your Arsenal

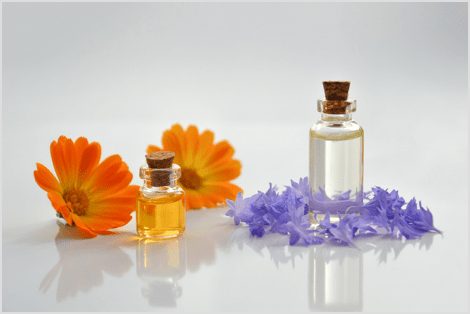
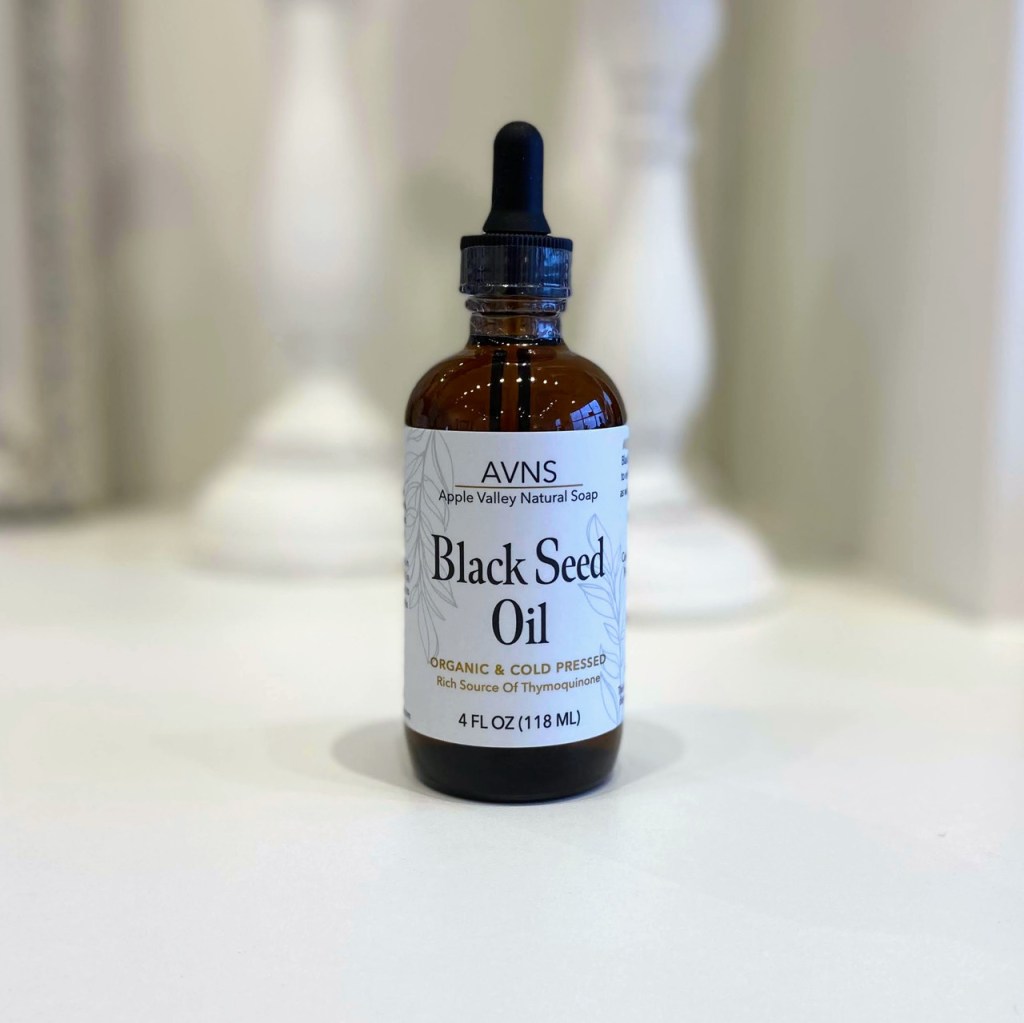
Black Seed Oil is the newest addition to the line-up of products offered by Apple Valley Natural Soap and could very well be your arsenals most powerful weapon. This unrefined, certified organic, cold pressed black seed oil has many health and beauty benefits. It is a remarkable and highly prized oil and can be used as a daily treatment for hair and skin. But what exactly is Black Seed Oil and what makes it so special? Keep reading to learn all about this special oil and why you should consider adding it to your collection.

What Is Black Seed Oil?

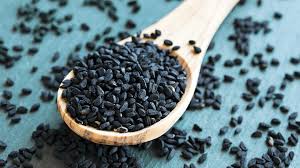
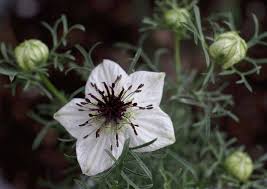
“An annual flowering plant from the Ranunculaceae family, the Nigella Sativa grows to around 16-24 inches with a large fruit containing the Black Seeds. ” “[The Nigella Sativa] can be found in warm places like Eastern Europe, Northern African, and Southwestern Asia. Black Seed Oil is an herbal ingredient derived from the tiny black seeds…These seeds have been used in traditional medicine for thousands of years. Preliminary evidence supports a few of its medicinal properties, primarily due to the seed’s high content of antioxidants and other bioactive compounds.” Other names for this product are Black Cumin Seed Oil, Black Caraway, Nigella and Kalonji Oil. “Black Seed contains an array of active compounds that are responsible for its health benefits. These include Linoleic Acid, Palmitic Acid, Monoterpenes, Thymol and Thymoquinone.” It is rich in fatty acids and potent antioxidants.

History Of Black Seed Oil

“Black Seed has been used by the ancient Egyptians to treat ailments such as digestive issues and inflammatory skin conditions such as rashes and bites. Its promising benefits were also noticed in other regions, where ancient Greek physicians recorded that Black Seed was administered to treat headaches, congestion and pain…Due to its prevalent use in ancient Egypt, Black Seed has been labelled as the ‘Secret of the Pharaohs’ – and was even found in Tutankhamen’s tomb! Native to the Mediterranean and Asian regions, Black Seed has been cultivated for over 3,000 years for a multitude of uses.”

Benefits & Uses For Black Seed Oil

As mentioned, Black Seed Oil has a variety of benefits ranging from cosmetic to medicinal. Black Seed Oil specifically contains an active compound called Thymoquinone and “it is the most studied compound in black seed. It is suggested by research that Thymoquinone may exert anti-oxidative and anti-inflammatory effects to target a range of health applications.” Nigellone and Thymoquinone are loaded with Omega 3, 6, and 9 and are necessary for optimal function of the immune system.

Some of the cosmetic benefits of Black Seed Oil include:

  • Strengthening hair as well as improving scalp health
  • Aiding in hair growth and delaying the onset of premature grey hair
  • The antimicrobial and anti-inflammatory properties make it a potent natural remedy for acne
  • It is effective in treating skin conditions, including acne, eczema, dry skin and psoriasis
  • Rich in vitamins, amino acids and essential fatty acids which help the skin retain moisture, maintain elasticity, and fight the damaging free radicals that cause aging
  • Improves skin pigmentation

And some of the medicinal benefits of Black Seed Oil include:

  • Some studies suggest that thymoquinone in black seed oil can induce cell death in several cancer cell types, including brain, leukemia, and breast cancer
  • The presence of thymoquinone promotes tissue growth and wound healing
  • Another study found that topical application of black seed oil improved pigmentation, as with Vitiligo, within six months
  • “A small study indicating that inhaled boiled black seed extract has a potential bronchodilatory effect on people with asthma, improving all markers of lung function and respiratory rate. And  four randomized controlled studies also found that black seed supplements may help manage asthma through the seed’s anti-inflammatory effects.”
  • “Studies have shown that thanks to the black seed oil’s powerful anti-inflammatory properties, this may benefit multiple aspects of health, including reducing the inflammation that contributes to the development of chronic conditions like type 2 diabetes, heart disease, and [as I mentioned previously,] cancer.”
  • Some research shows that black seed oil could be beneficial for stabilizing blood sugar levels.
  • And so much more!

This unrefined, certified organic, cold pressed black seed oil has many health and beauty benefits. It is a remarkable and highly prized oil and can be used as a daily treatment for hair and skin. I hope that you found this blog post informative and educational, or at least, learned something you didn’t know before. If you want to add this powerhouse oil to your arsenal, you can click here to shop or head over to our website, applevalleynaturalsoap.com and simply search for “Black Seed Oil” in our search bar.

What was your favorite fact about Black Seed Oil? Let me know in the comments!

If you found this post interesting, learned something new, or think of someone who might enjoy reading it, please share this blog post with your family and friends. It means the world to us! You can also leave us a comment to let us know what you learned or share one of your favorite hair care or skin care tips with us. We would love to hear from you!

All my love and have a happy week,

Amanda

PLEASE NOTE: This product is not intended for use in the diagnosis, cure, mitigation, treatment or prevention of disease. Keep out of the reach of children.

Sources:

Healthline – What Are The Benefits Of Black Seed Oil? https://www.healthline.com/health/food-nutrition/black-seed-oil-benefits

Viridian – The History Of Black Seed https://viridian-nutrition.com/en-us/blogs/nutrition-articles/video-the-history-of-black-seed

Cancer Cell Study – https://pmc.ncbi.nlm.nih.gov/articles/PMC4052177/

Vitiligo Study – https://pubmed.ncbi.nlm.nih.gov/31025474/


How To Be A Good Guest This Holiday Season

Happy November, everyone! Holiday season is nearly upon us and something that I don’t think is taught enough now a days is how to be a good guest. More often we focus on the ability to be a good host, but we are not the host 100% of the time. So how can we be good guests during the holidays this year?

1. Be Helpful

This might seem like an obvious one, but we can get so caught up in the day or event that we as guests can forget about the amount of work our hosts are putting into making it as lovely an event as it can be. So what can we do to help? We can simply start by asking this question of our hosts – “How can I help?” Now, sometimes your host will have everything under control at the moment and not need any assistance, but don’t just ask the question once. When the meal is over, ask if you can help clear the table or start on the dishes. At the end of the day, ask if you can help put chairs, leftovers, or decor away. There will be more than one opportunity to offer your help and to show appreciation to your hosts by helping to tidy up, so don’t just ask once. And if in the event you are told that there isn’t anything you can do to help every time you ask, simply pay attention to your surroundings and take care of your space. Clear your own dish after meal time, throw your trash away throughout the day, and do what you can to help keep the mess to a minimum and thus making less work for your hosts at the end of the day.

2. Bring a Gift

The act of giving your hosts a gift is simply not taught enough now a days. But something as simple as bringing a bouquet of flowers for your hostess goes a long way in expressing your appreciation for the invite. Like I said, it doesn’t have to be anything crazy or elaborate, it can be something simple that is catered to the individual or holiday. For example, a bouquet of flowers for your sister who is hosting a Friendsgiving party, a bottle of wine for your mom who is hosting Thanksgiving, or a bar of Seasonal Hand & Body soap from Apple Valley Natural Soap for your best friend who is hosting a Secret Santa Christmas party. Just a little something to say “Thank You!” to your host for opening up their home and providing a lovely meal.

3. Contribute To The Meal

This one is more common as often times the host will ask their guests to bring rolls, veggies and dip, or a pie to contribute to the meal time spread. But in case you haven’t heard anything from your host about contributing to the meal, simply ask them if they want you to bring something. And try to be specific. Sometimes if your host has already planned the menu it can be hard to try to think of a new idea for you. But if you offer to bring the dinner rolls, cranberry sauce, or a cheese and cracker tray, they may be more inclined to say yes to your offer as it doesn’t create any extra work for them at all.

4. Don’t Overstay Your Welcome

At the end of a long day (or more accurately, at the end of a long week, as your host has been preparing for and thinking of this event for a long time leading up) all a host wants to do is sit down and put their feet up. Now, I personally have been hosted by a wide range of personalities over the years. Some have the mentality of ‘there is a time frame and once the clock hits 8pm, all guests should be out the door,’ while others have a truly open door policy, where in you are welcome to stay as long as you would like, just please close the door behind you on the way out wether it is 9pm or 1am. My first piece of advice to you on this, is know your hosts! Are they likely to enforce a “end time” or do they have an open door policy? Either way, be respectful of their home, their space, and their time considering they have been busy for not just today but the past few days preparing to host you. Honor the “end time” if there is one and be respectful of the time as it gets late and try not to stay until after your hosts have all gone to bed (unless of course you are staying in the same home, then this doesn’t really apply to you.) Needless to say, be respectful of your hosts and their time and don’t overstay your welcome. The goal is to be invited back next year!

Some of these tips might seem obvious to you, but you would be surprised how little is taught on the art of being a good guest. I hope that at least one of these tips was helpful to you and maybe gave you some ideas on how you can be a better guest this holiday season.

Are you more often than not the host or the guest during the holidays? What other tips would you add to this list? And hosts, what would you like to see from your guests this holiday season? Let me know in the comments!

If you found this post interesting, learned something new, or think of someone who might enjoy reading it, please share this blog post with your family and friends. It means the world to us! You can also leave us a comment to let us know what you learned or share one of your favorite hair care or skin care tips with us. We would love to hear from you!

All my love and have a happy week,

Amanda


The Best Pumpkin Loaf For Autumn

You all absolutely loved the Chocolate Chip Zucchini Bread recipe I shared a few weeks ago, so in the spirit of Autumn and pumpkin spice season, here is another favorite loaf recipe of mine, Pumpkin Bread with Cream Cheese Frosting. The perfect way to spice up your baking and embrace the Autumn season for pumpkin lovers. I hope you enjoy it as much as I do!

Ingredients:

Pumpkin Loaf –

  • 1 Cup of Flour
  • 1 Teaspoon Baking Soda
  • 1/2 Teaspoon Baking Powder
  • 1/2 Teaspoon Salt
  • 1/2 Teaspoon Ground Cinnamon
  • 1 1/2 Teaspoon Pumpkin Pie Spice
  • 1/8 Teaspoon Ground Cloves
  • 1 Teaspoon Vanilla Bean Paste
  • 1 Cup Pumpkin Purée
  • 1/2 Cup Browned Butter
  • 2 Eggs
  • 1/4 Cup White Sugar
  • 1/2 Cup Dark Brown Sugar

Cream Cheese Frosting –

  • 6 Oz of Cream Cheese (room temp)
  • 1/4 Cup of Butter (room temp)
  • 1 Cup Powdered Sugar
  • 1/2 Teaspoon Vanilla Bean Paste
  • 2 Tablespoons of Milk
  • A Pinch of Salt

Recipe:

Pumpkin Loaf –

Preheat your oven to 350 degrees F.

Coat a loaf pan with parchment paper.

In a large bowl, sift together the flour, baking soda, baking powder, salt and spices.

In a medium bowl, beat together the eggs with the sugar until creamy.

Add melted butter, pumpkin purée and vanilla bean paste to your eggs and sugar mixture.

Add the wet ingredients in with the dry ingredients in the large bowl and stir gently to combine with a spatula until the dry ingredients are incorporated. (Do not over mix!)

Pour your batter into the prepared loaf pan.

Bake on the middle rack of the oven for 40-45 minutes or until a cake tester is inserted in the center and comes out clean.

Let the loaf cool in the pan for a few minutes once you remove it from the oven. Then remove the loaf from the pan (use the parchment paper to help you remove the loaf from the pan – please be careful when handling the hot pan!)

Allow the loaf to cool on a wire rack completely before adding the frosting so it doesn’t melt.

Cream Cheese Frosting – While Your Pumpkin Loaf Is Cooling

Using a hand beater, beat together the butter and cream cheese until its fluffy.

Add salt, vanilla bean paste and powdered sugar and combine until smooth.

Add your milk as needed until the frosting reaches your desired consistency.

Add the frosting to your pumpkin loaf once it is cooled.

Dust the top with some extra pumpkin pie spice if you want, slice & enjoy!

This Pumpkin Bread with Cream Cheese Frosting is the perfect pairing with your cup of afternoon coffee or as a sweet treat to enjoy cozied up at home on a cool autumn evening. I hope this recipe brings all of the cozy, autumnal vibes into your home and I hope you love it as much as I do.

Be sure to let me know what you think if you try this recipe out and feel free to share your favorite autumn recipe in the comments!

If you found this post interesting, learned something new, or think of someone who might enjoy reading it, please share this blog post with your family and friends. It means the world to us! You can also leave us a comment to let us know what you learned or share one of your favorite hair care or skin care tips with us. We would love to hear from you!

All my love and have a happy week,

Amanda


Make The Most Of This Autumn Season

Autumn is a very divided season! Some love it, while others look upon it with dread. For some, it is a refreshing season, the coolness in the mornings and evenings is a welcome change after the heat of the Summer. Others look at the Autumn months as nothing more than the gateway to winter. Too cold. Too gray. Marking the end to yet another gloriously warm Summer. Well, I am here today to do my best to help you embrace the change in season for all it can be – fun, refreshing, cozy, and oh so enjoyable. Here are my top tips for embracing the Autumn months and finding joy in the changing seasons.

1. Nature Walks

There is quite simply nothing like getting outside in October and going for a walk in nature! The vibrant colors all around you, the coolness in the air, and the sounds of nature preparing for a season of rest. There is something truly magical about how the trees put on such a show for us with all of their fiery yellows, oranges, and reds and dark greens. Wether you go with your family, a friend, your kids, or just by yourself, I encourage you to find a nature park or trail near you, get outside, and enjoy a walk surrounded by nature embracing the changing season.

2. Apple Orchards

Nothing screams Autumn quite like going to a good old apple orchard. The kids love it, the adults love it, and even grandma loves the fresh apples she gets to turn into yummy pies, jelly’s, and apple sauces. Find a local apple orchard, pack up the car with your family or friends, bring a picnic lunch, and enjoy a Saturday at the orchard picking apples, eating fresh apple cider doughnuts, and enjoying the cooler weather.

3. A Bonfire Night With Friends and Neighbors

One exciting thing about Autumn is the cooler mornings and evenings! Perfect for a warm bonfire outside with some toasty marshmallows. Invite your friends and neighbors to come over and join you by the fire (maybe with a Hot Toddy in hand) and let yourself relax into the simplicity of the night, the community, and crisp Autumn air.

4. Hot Apple Cider

You can pair this one with the one above, but I thought it was only right to give it it’s own feature spot. Apple cider is an Autumnal staple, some drink it cold (weirdos), while us normal people drink it piping hot. And some even like to spice it up a bit by making a Hot Toddy for a little extra warmth on a cool night. But no matter how you like to enjoy your cider, we can all agree it is a staple in Autumn and there is something both cozy and refreshing about drinking an apple cider a the orchard, around a bonfire, or cozied up on your couch in the evening with a good movie or book.

5. Baking An Autumnal Recipe

There are so many options to choose from, just pick your favorite! Pumpkin, apple, zucchini, molasses, maple, cranberry, and the list goes on. Choose your favorite flavors and spend some time in the kitchen with a candle, a cup of coffee or cider, and bake a delicious Autumnal recipe for your family and friends (or eat it all yourself, there is no judgement here.) Pumpkin loaf with cream cheese frosting. Apple pie with maple ice cream. Chocolate chip zucchini bread. Molasses cookies. Maple brown butter cookies. White chocolate and cranberry scones. Pick your favorite and start baking!

6. Decorate You Home For Autumn

This might be one of my favorite ways to embrace the changing season. I love a fresh space that welcomes the season and brings a bit of newness into my home. And the fun part is, there isn’t just one way to decorate your home! That is entirely up to you and your personal style. You can take inspiration from Pinterest, seasonal home magazines, or home decor shops. Or you can go entirely off the vision in your head! Have fun with it, bring your favorite parts of the season into your home, wether that is pumpkins, oak branches, or wheat. Oranges, greens, or golden yellows. Get creative and have fun! You can also bring Autumn into your home with scents through candles and soaps. Stock your bathrooms and kitchen with Apple Valley Natural Soap Seasonal Fall Soaps like Pumpkin Spice, Spice Cake, and Black Licorice.

Wether you already love the Autumn season or this is a season of dread for you, I hope this blog gave you some inspiration on ways you can embrace the change in season and enjoy it for what it is. A new season, a fresh start, full of new possibilities, and ready for you to make new memories. I hope I was able to help you embrace the change in season for all it can be and you were able to find some good take-aways from my top tips for embracing the Autumn months and finding joy in the changing seasons.

Do you have a favorite way to celebrate the changing seasons, specially this autumn? Share with us in the comments below and let’s start a conversation!

If you found this post interesting, learned something new, or think of someone who might enjoy reading it, please share this blog post with your family and friends. It means the world to us! You can also leave us a comment to let us know what you learned or share one of your favorite autumn hair care or skin care tips with us. We would love to hear from you!

All my love and have a happy week,

Amanda


The Best Chocolate Chip Zucchini Bread For Autumn

With the autumn season right around the corner and autumnal vibes already sneaking into our homes, I thought I would take a bit of a detour from my usual content to share one of my favorite autumn/winter recipes with you all. I mean, if Starbucks has already released their Pumpkin Spice Latte, then I think it’s fair to say that cozy vibes are not far behind. Baking is one of my favorite ways to celebrate and lean into the change of the seasons and this Chocolate Chip Zucchini Bread is the perfect pairing with your cup of afternoon coffee or tea or a sweet treat to enjoy cozied up at home on a cool autumn evening.

Ingredients:

  • 2 1/3 cups of flour (You can substitute a 1-to-1 measure gluten free flour if you want to make this recipe gluten free. My personal favorite is King Arthur Gluten Free Measure for Measure Flour.)
  • 1 teaspoon of baking soda
  • 1 teaspoon of baking powder
  • 1 teaspoon of salt
  • 1/2 teaspoon of ground cinnamon
  • 1/2 teaspoon of ground all-spice
  • 2 large eggs
  • 1 cup of white sugar
  • 5 tablespoons of butter (melted)
  • 1 zucchini shredded (about 7 ounces)
  • 2 teaspoons of vanilla extract (you can use a bourbon vanilla extract for a little extra flavor)
  • 1/2 cup of buttermilk (You can also use yogurt or even a dairy-free yogurt if you prefer.)
  • 1/2 cup of chopped 70% dark chocolate
  • 1/2 cup of chopped milk chocolate

Recipe:

Preheat the oven to 350 degrees F.

Coat a loaf pan with parchment paper.

In a large bowl, whisk together the flour, baking soda, baking powder, salt, cinnamon, and all-spice.

In a medium bowl, whisk the eggs with the sugar until creamy.

Add your melted butter, shredded zucchini and vanilla to your egg and sugar mixture.

Add the wet ingredients to the dry ingredients and stir gently with a spatula until the flour mixture is just incorporated. (Do not over mix!)

Stir in the buttermilk (or yogurt) until just combined and then add your chopped dark and milk chocolate.

Pour the batter into your parchment paper lined loaf pan.

Bake in the middle of the oven for 1 hour or until a cake tester inserted into the center of the loaf comes out clean.

Allow your loaf to cool in the pan for a few minutes.

Use the parchment paper to help you remove the loaf from the pan and put it onto a rack to cool completely. (Please be careful when handling the hot pan and bread!)

When you are ready, cut yourself a slice and enjoy as is or with a bit of salted butter. This Chocolate Chip Zucchini Bread is the perfect pairing with your cup of afternoon coffee or tea or a sweet treat to enjoy cozied up at home on a cool autumn evening. I hope this recipe brings all of the cozy, autumnal vibes into your home and I hope you love it as much as I do.

Be sure to let me know what you think if you try this recipe out and feel free to share your favorite autumn recipe in the comments!

If you found this post interesting, learned something new, or think of someone who might enjoy reading it, please share this blog post with your family and friends. It means the world to us! You can also leave us a comment to let us know what you learned or share one of your favorite hair care or skin care tips with us. We would love to hear from you!

All my love and have a happy week,

Amanda


How to Make Your Own Essential Oil Blends at Home

Image by Mareefe from Pixabay
Guest post by Megan Allen

Creating homemade essential oil blends can be a satisfying and aromatic experience. Not only can you customize scents to suit your preferences, but you can also tailor blends for specific benefits, from relaxation to energy boosts. This guide will walk you through the essentials of blending and the tools needed. In addition, provide recipes using popular oils and blends.

Essential Oil Basics

Concentrated extracts from plants, which are known for their aromatic and therapeutic properties, are called essential oils. They capture the essence of fragrance and beneficial compounds, derived from different parts of plants like leaves, flowers, and roots.

Common uses of essential oils include aromatherapy, where you inhale them for their calming or invigorating effects, and topical applications, where they alleviate skin conditions, pain, and inflammation. Additionally, essential oils can enhance mood, improve sleep, and support overall well-being, making them a versatile addition to daily routines.

Essential oils come in two main types: single oils and blends.

Single essential oils are pure extracts from specific plants, capturing their distinct fragrance and therapeutic properties. 

Popular examples include Lavender, renowned for its calming and sleep-enhancing effects, and Peppermint, known for its refreshing aroma and ability to relieve headaches and improve focus. Eucalyptus is frequently used for respiratory support, while Tea Tree oil is a powerful antiseptic and antifungal agent.

Blended essential oils combine multiple single oils to create synergistic effects that enhance their individual benefits. For instance, combining Lavender and Peppermint can offer relaxation and mental clarity, making such blends versatile for various applications.

When choosing the essential oils mix, it’s important to consider which carrier oil to use in the blend. Carrier oils, such as coconut, jojoba, and almond oil, dilute essential oils before topical application. Dilution is necessary because essential oils are highly concentrated and can cause skin irritation if applied directly. These carrier oils also help with the absorption into the skin, ensuring efficient delivery of therapeutic properties.

Tools and Materials Needed

To create your essential oil blends at home, you will need the following tools and materials:

Necessary Tools

  • Droppers: For precise measurement
  • Dark Glass Bottles: Protect oils from light and extend their shelf life.
  • Mixing Bowls or Beakers: For the blending process
  • Measuring Spoons: To ensure accurate ratios

Ingredients

  • Essential Oils: A variety of single essential oils for different purposes (e.g., Lavender, Peppermint, Eucalyptus)
  • Carrier Oils: Some examples are coconut oil, jojoba oil, and almond oil.

Optional Tools

Besides the basic tools previously mentioned, there are additional accessories that can improve your experience of blending essential oils. For instance, a Nugsmasher can assist in extracting essential oils by applying heat and pressure when you don’t have pre-extracted oils. This tool introduces a new aspect to blending oils at home. You can get yours at Green Thumb Depot if you want to extract oils this way.

Other optional tools include the following:

  • Aromatherapy Diffusers: Disperse your blends into the air.
  • Roller Bottles: Make application easy and convenient.
  • Labels: To mark and identify your blends.
  • Funnels: For transferring oils into bottles without spills.
  • Pipettes: To add small amounts of oils precisely.

Steps to Creating Your Blends

Step 1: Decide on Your Purpose

Identify the purpose of your essential oil blend by considering what you want to achieve, such as relaxation, an energy boost, improved focus, mood enhancement, or respiratory support.

For relaxation, select oils like Lavender and Chamomile, which promote calmness. Invigorating oils like Peppermint and Lemon are suitable if your goal is an energy boost. Defining your goal will guide you in selecting the best oils to create a personalized blend.

Step 2: Determine the Ratios

Understand basic blending ratios, focusing on top, middle, and base notes. Top notes, like Lemon or Peppermint, are light and evaporate quickly, providing an initial burst of scent. Middle notes, such as Lavender or Eucalyptus, are more balanced and last longer, forming the core of your blend. 

Base notes, like Sandalwood or Patchouli, are heavy and linger, grounding the blend. The commonly used ratio is three parts for the top note, five parts for the middle note, and two parts for the base note. Adjust these ratios to balance the overall scent and effectiveness.

Step 3: Mix the Oils

Combine the measured oils in a clean mixing bowl or beaker, ensuring you mix them thoroughly by stirring gently. This step is crucial to achieve a well-balanced blend where all the different oils harmonize effectively.

Step 4: Test Your Blend

Evaluate your blend by performing a scent test and a skin test. For the scent test, apply a drop of the blend to a blotter or cotton ball and smell it at intervals—immediately, after 30 minutes, and after an hour—to understand how the scent evolves.

For the skin test, dilute a small amount of the blend in a carrier oil and apply it to a small patch of your skin to check for any adverse reactions. Following these tests, adjust the blend as necessary by modifying the quantities of specific oils.

Step 5: Store Your Blend

Ensure your blend retains its potency by transferring it into dark glass bottles, which protect the oils from light. Label each bottle clearly with the name of the new blend and its creation date. Store the bottles in a cool, dark place away from heat and direct sunlight, which can degrade the oils over time.

Popular Blends You Can Consider

Lavender Bliss Blend

This blend combines the soothing scents of lavender, sweet orange, and cedarwood. It can help create a relaxing atmosphere, reduce stress, and promote restful sleep. The floral and woody notes work harmoniously to calm the mind and body, making it ideal for use in diffusers, bedtime routines, or as a calming massage oil.

Citrus Fresh Blend

A vibrant mix of lemon, grapefruit, and lime essential oils, this blend is designed to uplift and energize. The refreshing citrus aroma is perfect for boosting mood and revitalizing your space. In order to create a fresh, clean scent, use it in a diffuser or add a small amount to your cleaning solutions.

Peppermint Eucalyptus Blend

This blend is great for clearing nasal passages and improving concentration, combining the benefits of peppermint, eucalyptus, and rosemary. It is ideal for use during the cold season or when you need a mental boost. Apply it in a steam inhalation or use it in a diffuser to breathe easier and think clearer.

Calming Harmony Blend

This blend features bergamot, ylang-ylang, and patchouli, creating a balanced and tranquil atmosphere. It is perfect for reducing anxiety and promoting relaxation. The sweet, floral, and earthy notes make it suitable for meditation or unwinding after a long day. Use it in a diffuser or as a soothing body oil.

Immune Support Blend

A powerful combination of tea tree, lemon, clove, and eucalyptus, this blend is designed to boost immunity and fight off colds. Its antiseptic properties make it ideal for disinfecting and purifying the air. Use it in a diffuser during flu season, or add it to your homemade cleaning solutions for an extra germ-fighting boost.

Conclusion

Creating your essential oil blends at home is simple and enjoyable. With a wide range of essential oils available, such as Lavender, Peppermint, Eucalyptus, and more, you can craft blends tailored to your specific needs, whether for relaxation, energy, or immune support.

The process involves understanding scent profiles, experimenting with combinations, and making adjustments based on your preferences. Making your blends ensures natural, suitable solutions for various wellness goals. 

Thanks for reading!


Castor Oil: What Is It? The History & Benefits of Castor Oil

What Is Castor Oil?

Another week, another blog! Welcome back everyone, this week we will be diving into the world of castor oil. You have probably heard of castor oil at least once in your life but wether you are a regular user of castor oil or a newbie, this blog is for you!

What is castor oil anyway? Well, according to the National Institute of Health “castor oil is a [thick] vegetable oil made from the Ricinus Communis [the castor bean or castor oil plant], a plant common in the Eastern areas of the world.” Castor oil is a thick and mostly odorless oil but due to how thick it is, it is very tough to get out of clothing and can leave a dark, wet-looking stain. However, castor oil has been used for centuries for many different things such as (and most commonly) a natural laxative, to encourage birth in 40+ week pregnant women, hair and skin care, and so much more.

The History Of Castor Oil

Castor oil’s “first recorded medicinal use goes back to the time of the Ebers papyrus, an ancient Egyptian medical treatise… A traditional name for the plant is “Palma Christi” because of its supposed resemblance to the hand of Christ and its widely-reputed healing power.” “Castor Oil has been found in ancient Egyptian tombs dating back to 4,000 B.C. Evidence of its cultivation was discovered circa 500 B.C. in central Egypt where it was used in cosmetics, medicines and as a lamp oil. Castor oil is mentioned in the Ebers papyrus in recipes intended to treat numerous health conditions and ailments.” Castor oil has been used for hair and skin treatments, medicinal purposes, to cure leather, and oil lamps (although we can imagine that would not have smelled very nice) among other things. It was used in Egypt and all over the continent of Africa as well as in China, India and Brazil. Castor beans were brought to America and cultivated as early as the late 1600’s.

The MANY Uses For Castor Oil

We have a few of the benefits and uses of Castor Oil listed on our website:

Castor oil’s benefits for hair & body are many, here are the highlights

  • It is reputed to be good for repairing hair, softening skin, and easing aches and pains.  
  • Rich in fatty acids, as well as antioxidants.
  • Contains anti-inflammatory properties.
  • Anti-inflammatory and antibacterial properties make it effective for treating acne-prone skin, as it penetrates the skin easily without clogging pores or aggravating the skin condition.
  • Stimulates circulation to boost hair growth and locks in moisture.
  • Anti-fungal properties can treat scalp infections by eliminating the bacteria and microorganisms that can cause hair loss, dandruff, and infection. 
  • For mature skin types, it may delay the signs of aging by deeply moisturizing, softening and soothing the skin, boosting elasticity, and stimulating collagen production.
  • Restores the skin’s hydration and reduces the appearance of unwanted blemishes and scars when applied regularly.

Medicinally

  • Soothes skin inflammation caused by dry skin, acne, sunburns.
  • Relieves the discomfort of sore muscles and joint pain, especially for those who suffer from arthritis.
  • Antimicrobial properties help it work effectively as a disinfectant for wounds, minor cuts, and scrapes. 
  • Breaking up adhesions or scar tissue.
  • Strengthening the immune system
  • Increases relaxation and improves sleep quality
  • Improving lymphatic drainage
  • Reducing headaches
  • Detoxifying internal organs
  • Reducing menstrual cramps

Castor oil is a highly absorbent oil so if you put it on your skin, it will penetrate deeply and work quickly. It can be used with a Castor Oil Pack to help to break up blockages, inflammation, and bone spurs and growths under the skin. You can also put a little in your belly button with a small piece of organic cotton for better sleep, to relieve constipation, and improve overall health. Use the castor oil with a castor oil pack on your liver, kidneys, or thyroid* to help with detoxification. Use on your stomach and digestive system to improve inflammation, digestion and gut health. It has been said that castor oil can help with fertility in women. It can also be used both externally and internally to induce labor in 40+ week pregnant women. It has been used for centuries to induce labor because castor oil is a natural uterine contractor (which is why it is not recommended for use during pregnancy.)

*Please note that you should talk with a trusted natural doctor or specialist before you use a castor oil pack for detoxification and be aware of the side effects of the detoxification process. You might not feel your best for a day or two during detoxification as your body has to clean out and flush all of that crap (pun intended) from your body. When using a castor oil pack, start with only 20 minutes at a time a couple of times a week for a couple of weeks or so and slowly increase the time and frequency as your body is able. Eventually you will be able to wear your castor oil pack overnight.

Why the Quality Of Your Castor Oil Matters

As with most things, the quality of the product you use matters. As mentioned earlier, castor oil is a highly absorbent oil so if you put it on your skin, it will penetrate deeply and work quickly. If you are putting something onto your skin that will be quickly absorbed deeply into your body, wouldn’t you want to make sure is it the best of the best? If you are getting castor oil for any topical or internal uses, make sure that it is first and foremost Organic. This means we don’t need to worry about it the castor bean plant having been sprayed with chemicals and pesticides or grown with the use of GMO’s. Next you want to make sure it is Cold Pressed and Expeller Pressed, this means it is not heated while going through the extraction process so none of the goodness and healing benefits of the castor oil have been lost or “cooked out” of the oil. And finally you want to make sure your castor oil is Hexane Free. You might be asking, what in the world is hexane? Great question, according to Toxic-Free Future, “Hexane is a solvent widely used as an industrial cleaner and degreaser and is an ingredient in many consumer products. Easily inhaled or absorbed through the skin, hexane has been recognized for more than 40 years to cause long-lasting and even permanent nerve damage in feet, legs, hands, and arm.” Do you want that in your castor oil to be absorbed into your body and organs? Yeah, I didn’t think so. A castor oil this pure can be tough to find but don’t worry! We have an amazing organic, expeller and cold pressed, hexane free castor oil just for you on our website, or if you are a Minnesota local, you can stop by the AVNS Boutique to pick up a bottle.

Organic Cold Pressed Castor Oil | Expeller Pressed, Hexane Free Castor Oil

A beauty staple for centuries, this unrefined (virgin), certified organic, cold pressed castor oil is a nutrient-rich, moisturizing and conditioning oil for hair, skin & nails. Soothe, soften, and promote healing with our rich, nourishing, hexane free Castor Oil.

Use alone, or with a Castor Oil Pack for cleansing internal organs, helping sore joints, & reducing inflammation. Our Organic Castor Oil is thick and undiluted and is packaged in a 16 ounce amber glass bottle.

(Please note that this product is not intended for use in the diagnosis, cure, mitigation, treatment or prevention of disease. Castor oil may stain clothing or other fabrics. Keep out of the reach of children. For topical use only, do not use on open wounds, and do not use if pregnant.)

How To Use A Castor Oil Pack

What You’ll Need:

1. Unrefined (virgin), certified organic, cold pressed castor oil

2. Select your desired Castor Oil Pack (or all of them)

3. A heating pad or hot water bottle if desired. (A heating pad or hot water bottle is recommended if you are only wearing the castor oil pack for a short period of time, it is not necessary if you are wearing it overnight.)

4. A glass container with a lid to store the oil soaked pack in-between uses. A glass mason jar or glass food storage container would both be great options.

5. Old clothes and towels – as mentioned above, castor oil stains so it is best to wear old clothes that you don’t mind having oil stains. And you’ll want to put an old towel down where you are planning to sit or sleep to protect your furniture from the oil.

6. A place to relax that you will be comfortable.

Directions:

1. Choose your relaxing spot and place the towel down to protect the furniture from oil. And wear old clothes you don’t mind getting oil stains.

2. Have your book, TV show, or music and snack or tea ready to go. (Making this an enjoyable experience is important!)

3. Have your hot water bottle or heating pad ready to go where you will be laying.

4. Drizzle your Castor Oil Pack with about 1 Tablespoon of Castor Oil

5. Place the Castor Oil Pack on where you want it (most commonly over your liver or kidney’s, thyroid, stomach/digestive system, etc.)

6. Get into your relaxing spot and put the heating pad or hot water bottle over the pack.

7. Lay back and relax for 20 minutes to an hour. If you have a pack with ties and you’ve gotten used to using the pack, you can go about your day wearing it or sleep with it on.

8. When it is time to remove the pack, gently take it off and wipe off the excess oil with an old towel or rub the excess oil into your skin. Place the pack into your glass container and put the clothes and towels you used into the wash. (Make sure you don’t put your Castor Oil Pack into the washing machine.)

Personal Castor Oil Testimony

I personally have used castor oil regularly and for many things for almost a year now. I was first introduces to Castor Oil and Castor Oil Packs when my doctor recommended it to help with liver detoxification. I used castor oil packs on my liver primarily for many months and then when I started to deal with inflammation in my abdomen and digestive issues, I used the castor oil packs on my abdomen overnight. I also used castor oil in my belly button overnight with a small piece of organic cotton to help with sleep and to fight against inflammation. During this time I have done lots of research on castor oil and its many benefits. I have personally seen the healing benefits of castor oil and have recommended it to family and friends. I have also used castor oil to help fight against dryness and irritation in my ears from years of being a competitive swimmer, countless ear infections, and antibiotic ear drops. During 2023 I was dealing with some health issues and I would get inflamed lymph nodes and adrenal glands frequently, so I would apply castor oil to them to help with drainage and decrease inflammation. A high quality castor oil is an amazing tool to have in your self care collection and I couldn’t recommend it enough!

If you found this post interesting, learned something new, or think of someone who might enjoy reading it too, please share this blog post with your family and friends. It means the world to us! You can also leave us a comment to let us know what you learned or share one of your favorite skin care tips with us. We would love to hear from you!

All my love and have happy week,

Amanda Pehrson

Sources:

The National Institute of Health – https://www.ncbi.nlm.nih.gov/books/NBK551626/

Health First Network – https://healthfirstnetwork.ca/blog/why-castor-oil-has-been-around-for-centuries/

Qhemet Biologics – https://qhemetbiologics.com/blogs/news/the-history-benefits-of-castor-oil#:~:text=Castor%20Oil%20has%20been%20found,and%20as%20a%20lamp%20oil.

Apple Valley Natural Soap – https://www.applevalleynaturalsoap.com/organic-cold-pressed-castor-oil-expeller-pressed-hexane-free-castor-oil/


How to Remove Stains Naturally

This blog was inspired by our Kitchen Salt and Spice Bar, which has been known to work all kinds of miracles! This is a soap that can remove beet juice stains. This is a soap that can remove the strong smell of onion and garlic from your hands. This soap also makes a great dish washing soap for camping! Having methods for removing stains is extremely helpful. Here are some natural methods to remove different kinds of stains.

How to remove blood stains naturally

Little cuts and scrapes happen all the time! While our first priority is to find a band-aid, what will we do about the bloodstain on the couch cushion?! Hydrogen peroxide might be all you need! Method taken from The Maids, “How to Remove Blood Stains Naturally”

  • Immediately soak the clothing in cold water or run cold water over the stain until it fades.
  • Soak a microfiber cloth in 3% hydrogen peroxide and lightly scrub the stain.
  • Apply a pre-treatment of a few drops of liquid laundry detergent to the blood stain.
  • Wash the stained clothing in cold water with a natural bleaching agent like hydrogen peroxide, distilled white vinegar, or baking soda.
  • Let the clothing air dry and then see if the stain is gone. Don’t dry your clothing after the wash; the heat could set any remaining stain.
  • If the stain is gone, wash and dry your clothing like you usually would.
  • If you still see the blood stain, scrub it again with hydrogen peroxide and repeat the washing instructions above.

How to remove juice stains naturally

Drinks spill all of the time, and fruit juice stains are some of the most difficult to clean…especially grape juice! These stains can still be removed though!

Method taken from Stain Solutions

  1. Soak for 15 minutes in mixture of one quart lukewarm water, one-half teaspoon liquid hand dishwashing detergent and one tablespoon white vinegar. Rinse.
  2. Sponge with rubbing alcohol, using light motions from center to edge of stain.
  3. Soak for 30 minutes in one quart warm water with one tablespoon enzyme presoak products.
  4. If color stain remains, launder in chlorine bleach if safe for the fabric, or in oxygen bleach.

How to remove butter stains naturally

Greasy foods make for some messy times and messy means spills! Now worries, butter stains aren’t as hard to remove as you thought!

Method taken from The Maids

  • Blot or scrape away as much of the butter as you can from the surface you are trying to remove the stain from.
  • Pour baking soda onto the stain and gently rub it into the stain. Let the baking soda sit for 15 minutes to absorb the oils from the butter.
  • Scrape away the baking soda and repeat the step above until no more oil is being absorbed.
  • Pat the stained area dry with a clean white cloth and then vacuum up the remaining baking soda.

Helpful hints on removing stains from different kinds of fabrics

The porosity and structure of different fabrics can alter the way they stain and influence what you use to remove stains! Here are some interesting tidbits from Art of Manliness.

Cotton: can endure soaking, drying, and heat (though you want to avoid the latter for most stains — warm water is fine, but dry heat just sets the stain). It’s easy to bleach white cotton, but very hard on the fabric, so use chlorine bleaches as a last resort, and dilute them well. The best stain treatments for cotton are detergents and light acids (lemon juice, vinegar, etc.).

Wool: is much more heat-sensitive than cotton, and needs to be treated gently. You can soak it, but you have to lay it flat as it dries to prevent distortion. Use only wool-safe detergents and lukewarm (not hot) water — bleaches and acidic treatments will damage the wool permanently. Treat with water or a wool detergent as soon as possible, and then get the garment to the dry cleaner at the first opportunity.

Synthetics: vary depending on the material. Rayon and polyester can be washed and scrubbed more harshly than cotton, but will be destroyed by oxidizing bleaches like hydrogen peroxide. It’s usually best to clean them with a standard laundry detergent, or with dish soap for grease-heavy stains.

Silk: is exceedingly temperamental. You can treat stains on silk with water, but rather than letting the wet spot dry on its own, rinse the whole garment thoroughly — otherwise you’ll get water spotting, nearly as bad as the original stain. Glycerin stain remover is also effective and neutral.

Of course, if none of these methods work you can always just give our Kitchen Salt and Spice Bar a try!

Much love,

Nora


How To Fix Oily Roots and Dry ends

Greasy roots and dry ends can ruin a good hair day. The key to fixing greasy roots is a shampoo that helps balance the scalps oil production. What kind of shampoo fixes oily roots? The best kind of shampoo for dealing with oily roots is a moisturizing shampoo that also has an ingredient that actively absorbs oil (like clay). Your roots get cleaned and your dry ends get the hydration they need.

Roots Get Greasy Fast?

Many people will try to combat oily roots by overwashing their hair with shampoos that contain harsh detergents to lift oil from the scalp. 

Short term, this seems like a solution, but your scalp produces oil for a reason. The oil your scalp produces is called sebum, which actually benefits your hair when the appropriate amount is distributed along your hair shaft (usually occurring naturally when you brush your hair). 

Sebum protects your hair shaft and makes it shine, but too much leads to oily roots. When you constantly strip your scalp of oil it sends a message to your scalp that it needs to produce even more oil…leaving you with greasy roots.

A moisturizing shampoo made with oils that protect the ends of your hair and gently cleanse your scalp won’t cause your scalp to overproduce sebum. The best moisturizing soaps are natural soaps and shampoos.

Why Do My Roots Get So Greasy?

There are many reasons why you might be more prone to oily roots including genetics, acne and bacterial issues, skin conditions, and overwashing. If you want to fix your oily roots and be able to go longer between washdays you have to set your hair up for success

Using a shampoo with clay will help decrease the amount and appearance of oil in your roots. Clay has an absorption power that pulls in oil and clarifies your scalp. You can read about the clays we use and their beauty benefits here

Greasy Roots Shampoo

My roots get greasy after 24 hours and I’ve found great success with this Rhassoul and Avocado shampoo bar. This bar was formulated with ingredients to combat problematic hair! And will keep the ends of your hair moisturized!

Rhassoul Clay:

  • Contains a high percentage of silica, magnesium, potassium, and calcium
  • Absorbs oil and impurities from both the skin and hair

Avocado oil and Avocado butter:

  • Softens and soothes skin
  • Increases production of collagen
  • Locks in moisture
  • Fatty acids gives hair shine and silky texture
  • Helps fight frizz

Aloe vera:

  • Contains proteolytic enzymes which repairs dead skin cells on the scalp.
  • Rich in vitamin C, E and beta carotene which nourishes skin and scalp deeply. 
  • Has antifungal and antiviral properties, it prevents itching and reduces dandruff and flaking
  • Also has very potent anti-inflammatory properties which help reduce redness and inflammation. 

“I am absolutely in love with my shampoo bar!! This was the first time I tried shampoo bars and I did so much research to find the cleanest brand. There was no question AVNS won that category by a long shot. Then they won because they offer 5oz bars instead of 2oz like most others. Then they won on the price. I have very oily hair and struggle to find hair products so I was nervous and kind of negative about whether or not it would work. Well, I used it ONE time and I was never turning back. My hair has never lasted so long without being oily. It doesn’t have any residue or waxy feel leftover after showering, it smells amazing, feels great, and moisturizes my scalp- which usually flakes with other shampoos. I was shocked and amazed and I have recommended AVNS to everyone I know. I also used the baking soda trick (I love that they offer so many blog posts and tips, especially since I was a first time user) and the Lavender Mint hair rinse. Another amazing product I highly recommend. I was getting so many compliments on my hair and people asked what I was doing. I was happy to say “only AVNS!” If you’re on the fence, just go for it. It’s worth it. Thank you AVNS for making clean products that actually work.”

-Satisfied Customer

Acid Hair Rinse To Clarify Roots

Another great way to clarify your scalp and hair is with an acidic hair rinse. An apple cider vinegar rinse will remove build up from your hair and smooth your hair shaft, our Herbal Hair Rinse is made with herbs to further strengthen and cleanse your scalp and hair. This rinse is made to aid the soothing of skin conditions and may help prevent acne!

I hope we’ve helped to “clarify” when it comes to questions about how to get rid of oily roots! Follow our blog for more information on who we are and the natural products we make!

Much Love,

Nora


How To: Traditional Wet Shave

The benefit of a traditional shave or a traditional wet shave is that it will give you a smoother, cleaner, closer cut. All you need for a traditional shave is a quality shaving soap, water, a single bladed razor, and a brush. A traditional shave is sustainable and pairs with with our natural shaving products which are long-lasting, cruelty free, and eco-friendly.

How to do a Traditional Shave

  • Wet your brush under running hot water and allow it adequate time to absorb water.
  • Don‘t tap too much excess water off the brush, then lather up the soap using circular motions directly in a container or vessel of your choice. At first, the bubbles will appear large, but as you keep going, they will increase in number and become smaller. After a short while you should have achieved a thick, warm lather.
  • Apply and massage the warm lather with the soaped brush evenly across your face in circular motions. This will also increase the lather‘s density, soften your whiskers, and allow them to stand up, allowing the razor to sit close to the base of the hair follicle. 

How to Get a Good Shaving Soap Lather

The longer you whisk in circles, the richer the lather, the smoother the shave and the more your skin will be protected.

The Key to a Good Shaving Soap

A high fat content so skin is protected during the shave, it will also nourish your skin so it doesn’t become dry and irritated. A good shaving soap is economically a great choice as it lasts a long time, and it is a wonderful option for your skin because it adds, not detracts, moisture. Ingredients such as olive oil, shea butter and avocado will do just that, nourish and protect skin during and after the shave. Our Men’s Shaving Soaps are all this and more as we’ve also added bentonite clay which brings slip to help the razor glide over the skin, and colloidal oats which help protect and soothe.

Benefits of a Traditional Wet Shave

  1. Effectiveness: cleaner, closer, smoother shave
  2. Non-problematic: reduces amount of ingrown hairs
  3. Process: is more relaxing and enjoyable than shaving with an electric razor
  4. Appearance: a stone shaving bowl set looks much more classy than a metal can of shaving foam.

Easy After Shave Routine Using Natural Products

  1. Gently rinse the shaved area
  2. Pat dry
  3. Spritz an organic facial toner over the area to help clean and balance the skin.
  4. Rub in a few drops of argan or jojoba oil over area to protect and moisturize.

The Classic Shaving Soap

A warm woodsy scent with a hint of spice. This shaving soap is great for all skin types, but Classic’s blend of essential oils may assist those with oily skin. Cedarwood can help soothe irritation, inflammation, redness, and itchiness. Frankincense has powerful antiseptic and healing properties, bergamot is a natural cleanser so helps remove dirt and impurities and is great for those with oily skin as it helps to unclog pores, it also has anti-inflammatory, antibacterial and anti-fungal properties. Patchouli helps regenerate skin cells, which assists the healing of wounds and helps fade scars. Litsea cubeba contains antiseptic and astringent properties which makes it an excellent tonic for your skin, it also helps balance sebum levels on the skin surface and controls its production. And coriander is very soothing, plus has anti-inflammatory, antiseptic and anti-fungal properties.

Ingredients: saponified oils of organic olive, organic coconut, organic sustainable palm, castor bean, organic shea nut butter, and avocado. Bentonite clay, organic colloidal oats, rosemary oil extract, and essential oils of organic cedarwood, bergaptene free bergamot, frankincense, patchouli, organic litsea cubeba, coriander.

The Rugged Shaving Soap

A fresh outdoors scent with a touch of citrus and a hint of woodsy spice. It is also great for all skin types, but the blend of essential oils may benefit those with dry skin. Jamarosa oil is an exotic addition which is known for its anti inflammatory and antiseptic properties. Bay is warm and spicy plus offers antimicrobial and antioxidant benefits. Cedarwood can help soothe irritation, inflammation, redness, and itchiness, and ho wood has antiseptic, analgesic, antimicrobial, and soothing properties.

Ingredients: Saponified oils of organic olive, organic coconut, organic sustainable palm, castor bean, organic shea nut butter, and avocado. Bentonite clay, organic colloidal oats, and essential oils of bay, jamarosa root, organic cedarwood, organic ho wood.  Rosemary oil extract.

Man 2.0 Shaving, Shampoo, and Body Bar

Men, now you can have your soap, shampoo, and shaving cream too. Made with organic olive oil, organic shea nut butter, and organic jojoba oil for an ultra gentle, moisturizing treatment, as well as bentonite clay for slip and silk on your face when shaving, this deliciously scented shampoo bar lathers like crazy and will leave you looking, feeling, and smelling like a million bucks in a few short minutes.

Ingredients: saponified oils of organic coconut, organic sustainable palm, castor bean, organic olive, organic sunflower, apricot kernel, organic shea nut butter, and organic jojoba, bentonite clay, rosemary oil extract, and essential oils of bay, orange, and cedarwood.

Man, after writing this I feel like, as a woman, I might be missing out on this shaving experience! Which begs the question, can this same method work on legs? Guess there’s only one way to find out!

Much Love,

Nora