The Best Chocolate Chip Zucchini Bread For Autumn

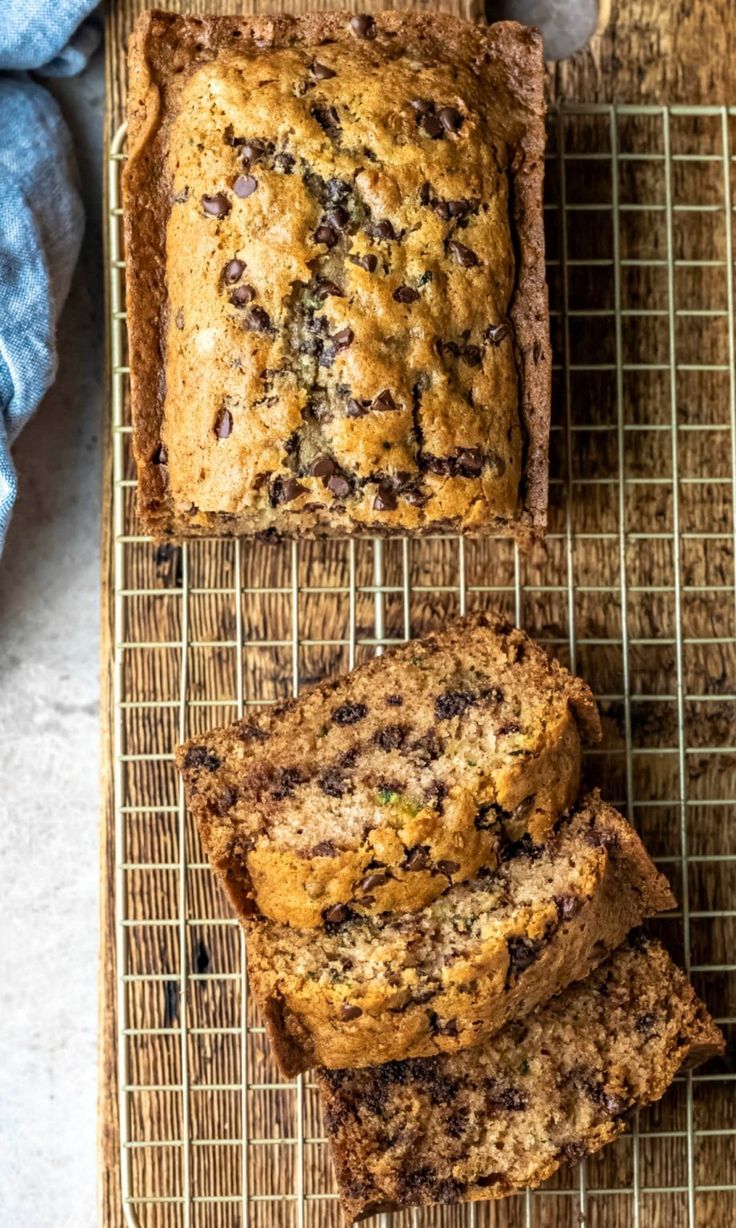
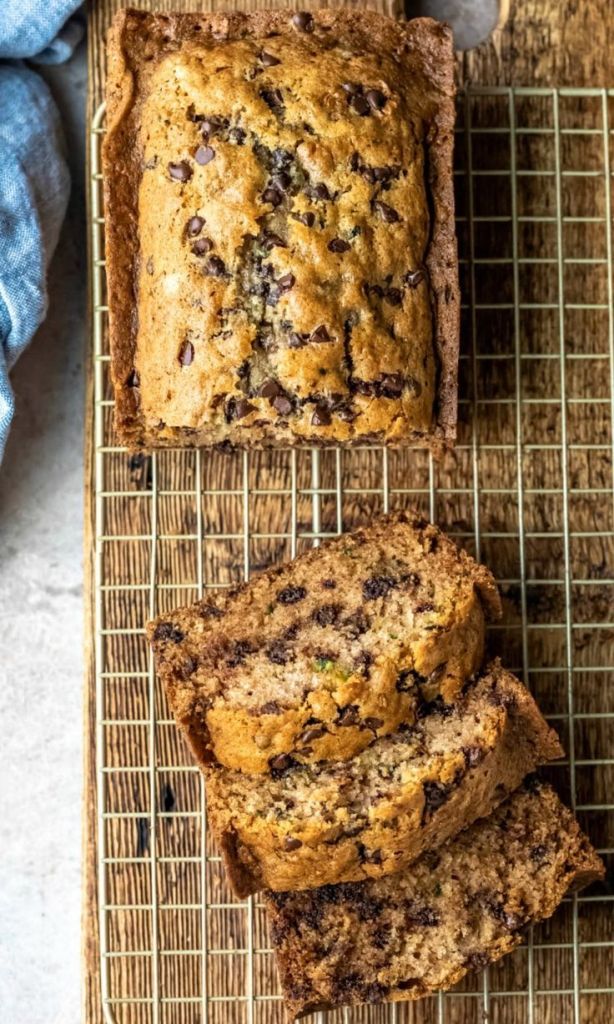
With the autumn season right around the corner and autumnal vibes already sneaking into our homes, I thought I would take a bit of a detour from my usual content to share one of my favorite autumn/winter recipes with you all. I mean, if Starbucks has already released their Pumpkin Spice Latte, then I think it’s fair to say that cozy vibes are not far behind. Baking is one of my favorite ways to celebrate and lean into the change of the seasons and this Chocolate Chip Zucchini Bread is the perfect pairing with your cup of afternoon coffee or tea or a sweet treat to enjoy cozied up at home on a cool autumn evening.

Ingredients:

  • 2 1/3 cups of flour (You can substitute a 1-to-1 measure gluten free flour if you want to make this recipe gluten free. My personal favorite is King Arthur Gluten Free Measure for Measure Flour.)
  • 1 teaspoon of baking soda
  • 1 teaspoon of baking powder
  • 1 teaspoon of salt
  • 1/2 teaspoon of ground cinnamon
  • 1/2 teaspoon of ground all-spice
  • 2 large eggs
  • 1 cup of white sugar
  • 5 tablespoons of butter (melted)
  • 1 zucchini shredded (about 7 ounces)
  • 2 teaspoons of vanilla extract (you can use a bourbon vanilla extract for a little extra flavor)
  • 1/2 cup of buttermilk (You can also use yogurt or even a dairy-free yogurt if you prefer.)
  • 1/2 cup of chopped 70% dark chocolate
  • 1/2 cup of chopped milk chocolate

Recipe:

Preheat the oven to 350 degrees F.

Coat a loaf pan with parchment paper.

In a large bowl, whisk together the flour, baking soda, baking powder, salt, cinnamon, and all-spice.

In a medium bowl, whisk the eggs with the sugar until creamy.

Add your melted butter, shredded zucchini and vanilla to your egg and sugar mixture.

Add the wet ingredients to the dry ingredients and stir gently with a spatula until the flour mixture is just incorporated. (Do not over mix!)

Stir in the buttermilk (or yogurt) until just combined and then add your chopped dark and milk chocolate.

Pour the batter into your parchment paper lined loaf pan.

Bake in the middle of the oven for 1 hour or until a cake tester inserted into the center of the loaf comes out clean.

Allow your loaf to cool in the pan for a few minutes.

Use the parchment paper to help you remove the loaf from the pan and put it onto a rack to cool completely. (Please be careful when handling the hot pan and bread!)

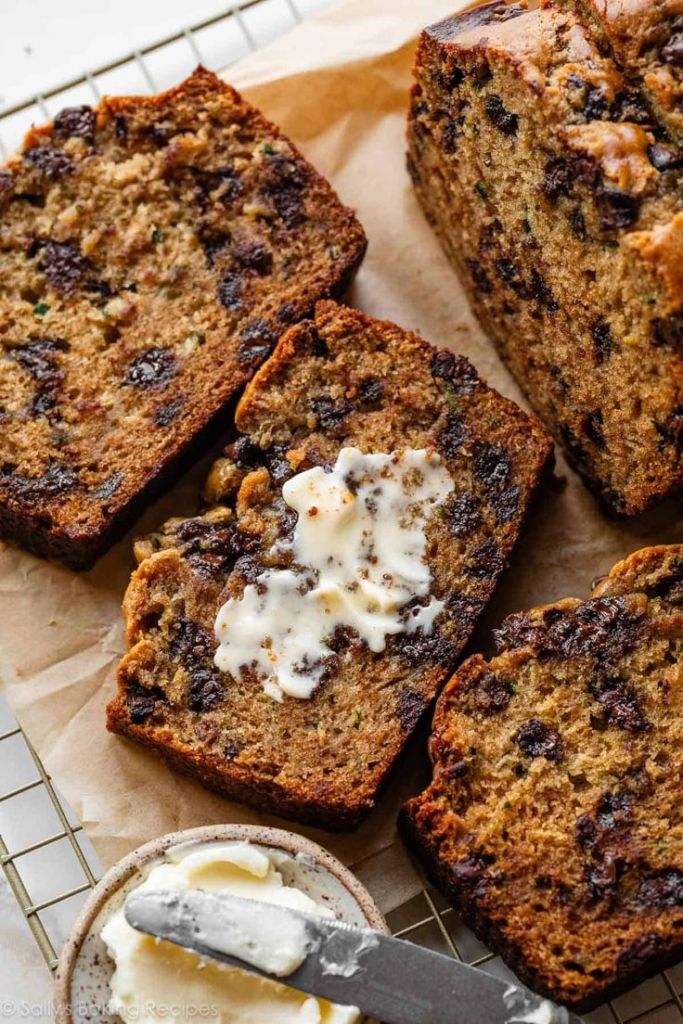
When you are ready, cut yourself a slice and enjoy as is or with a bit of salted butter. This Chocolate Chip Zucchini Bread is the perfect pairing with your cup of afternoon coffee or tea or a sweet treat to enjoy cozied up at home on a cool autumn evening. I hope this recipe brings all of the cozy, autumnal vibes into your home and I hope you love it as much as I do.

Be sure to let me know what you think if you try this recipe out and feel free to share your favorite autumn recipe in the comments!

If you found this post interesting, learned something new, or think of someone who might enjoy reading it, please share this blog post with your family and friends. It means the world to us! You can also leave us a comment to let us know what you learned or share one of your favorite hair care or skin care tips with us. We would love to hear from you!

All my love and have a happy week,

Amanda


Fabulous Friday & Glycolic Peel

Have you ever had one of “those” days? 

You know, one of those days where you have great plans for everything you’re going to get done, but by the end of the day, even though you’ve been busy, you’re not quite sure how you managed to NOT get anything on your list done.

Well that’s been my day, well, it’s actually been my last week. At least it feels like it. 

Truthfully, I have been busy. Busy with the business (AVNS), busy with family, busy with life in general. But I don’t think I’m any more busy than most people, it seems to be the world we live in. But I guess that doesn’t make it okay. I’m starting to realize that when we’re busy, we miss out on so many things. So busy is okay for periods of time, then we need to do life with our family and friends.

Now I’m laughing at myself, this is NOT what I was going to blog about, but hey, welcome to my life!!!

This blog is over due, sorry! 

I thought it would be fun to give you all a recipe to try at home. We will eventually do some youtube videos, but we’re not quite there yet. So here’s a recipe I use at home on myself as a peel. Yes a homemade glycolic face peel, and I love it!

First, what is Glycolic Acid and it’s benefits?

Glycolic acid is simply an Alpha Hydroxy Acid (AHA) derived from cane sugar. It has many benefits, some of which are:

  • Removes blackheads
  • Purifies pores
  • Improves texture of skin
  • Gently exfoliates dead cells
  • Gets rid of acne scars
  • Brightens skin tone
  • Reduces hyperpigmentation

I’m sure there are more, but I was super excited when I saw how the texture of my skin improved after doing this only once. You may be tempted to try this every day, but don’t, that would be too harsh on your skin. Start with once a week and then eventually move up to twice a week if needed. 

The items you’ll need:

Sugar, brown or white. Lemon juice or Yogurt. Manuka honey (opt.). Small bowl and spoon.

Before we get started, here are some details about the ingredients and why:

I already talked about why we use the sugar, so I’ll move onto an ingredient we have listed as optional. Manuka honey. It is expensive, so that’s why I made it optional, but here are some of the benefits to consider:

It is a potent anti-inflammatory, so soothes inflamed skin while healing blemishes. It also helps balance the skin’s pH and contains amino acids which slough away dead skin cells, helping to keep pores clear. Another benefit I like is that Manuka honey has been shown to increase collagen cross-linking, promoting the structural growth of collagen in skin cells. And since amino acids are the building blacks of collagen, they also protect collagen. Healthy collagen means healthy, firm, youthful-looking skin. It is also a natural humectant, drawing moisture into the skin. This hydration helps to further enhance the skin’s elasticity and cell regeneration, as well as promote healing.

Lemon juice. We use this because it’s rich in vitamin C, plus it contains citric acid which helps with the effectiveness of the peel. But if you have sensitive skin, you may want to try plain yogurt instead. Yogurt contains lactic acid, it’s still effective with the peel, but more gentle on the skin.

The recipe:

1 T soft brown sugar

1 T lemon juice (or 1 T plain yogurt)

opt. 1 T Manuka honey (if you use the honey, reduce the lemon juice down to 1 tsp)

Small bowl and spoon

That’s it!

The process:

I use whatever sugar we have in the house, which is typically Muscavado. So I need to blend/grind my sugar down to a powder so it is more gentle on my face. But if you’re using a fine grain/soft sugar, you’ll be okay.

  • Put your sugar into a bowl and add the honey (if using), and lemon juice (or yogurt).
  • Mix together until they are well combined. 
  • Apply gently in circular motions to a clean and slightly damp face. Avoid eyes and mouth.
  • Let it sit for 3-5 minutes
  • Rinse thoroughly with warm water, pat dry and follow with a moisturizer.
  • Love your skin!!!

Let me know if you try it 🙂

Until next time,

Marianne